

If you've ever purchased rough lumber for a woodworking project, you know that getting it flat and ready to use is one of the most important steps in the building process. Unlike dimensional lumber from a home improvement store, rough-sawn lumber often has twists, bows, cups, and uneven surfaces that need to be corrected before you can start building. Flattening rough lumber doesn't have to be difficult, and you don't necessarily need expensive equipment to get professional results. Whether you're a beginner woodworker or an experienced DIY enthusiast, there are several ways to flatten a board using tools you may already have in your workshop. In this guide, we'll cover three popular methods for flattening rough lumber: using a handplane, a thickness planer, and a router sled. Each method has its own advantages, and choosing the right one depends on the size of your board, the tools you have available, and the results you're looking to achieve.
Why Is It Important to Flatten Rough Lumber?
Before discussing the different methods, it's important to understand why flattening lumber matters. Rough lumber is rarely perfectly flat. Boards can develop imperfections during drying, storage, and transportation. Some common problems include:
Cup: The board curves across its width, creating a concave or convex surface.
Bow: The board curves along its length.
Twist: The corners of the board are no longer in the same plane.
Crook: The board curves along one edge.
If these imperfections aren't corrected, they can cause problems during assembly. Joints may not fit properly, boards may rock or shift during construction, and finished projects may have uneven surfaces. The goal is to create one perfectly flat reference face. Once that surface is established, you can flatten the opposite face and bring the board to a consistent thickness.
Method 1: Flattening Rough Lumber With a Handplane
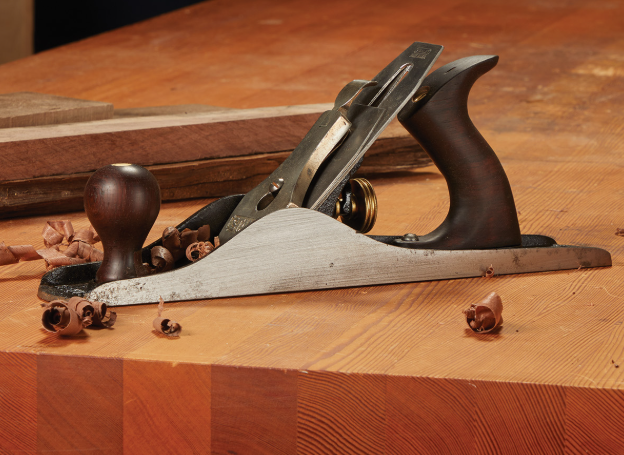
One of the oldest and most traditional ways to flatten rough lumber is with a handplane. Although this method requires some practice and physical effort, it offers excellent control and doesn't require expensive machinery. A handplane works by shaving thin layers of wood from high spots until the surface becomes flat.
What You'll Need
A handplane, preferably a No. 5 jack plane or No. 7 jointer plane
Winding sticks
A straightedge
A pencil
A sturdy workbench with board-holding capability
Step 1: Identify the High and Low Spots
Start by placing your board on a flat work surface. Use winding sticks positioned near opposite ends of the board to identify any twist. Look across the tops of the winding sticks. If their top edges aren't parallel, your board has a twist that needs to be corrected. You can also use a straightedge to identify high and low spots along the length and width of the board.
Step 2: Mark the High Spots
Use a pencil to lightly mark the areas that need to be removed. This will help you identify where to focus your planing. Concentrate on removing material from the high spots rather than trying to plane the entire board evenly right away.
Step 3: Start Planing
Begin with diagonal strokes across the board, working from different directions as needed. This helps remove high spots and gradually brings the surface into the same plane. Once the major imperfections are removed, switch to longer strokes running with the grain. Continue checking your progress with winding sticks and a straightedge.
Step 4: Finish the Surface
Once the board is flat, take lighter finishing passes with your handplane to create a smooth, consistent surface.
Advantages: A handplane is relatively inexpensive, doesn't require electricity, and allows excellent control over material removal.
Disadvantages: It takes practice, can be physically demanding, and may be time-consuming when working with large boards.
Method 2: Flattening Rough Lumber With a Thickness Planer
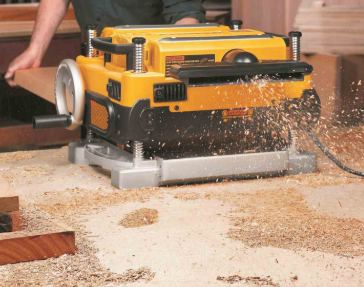
A thickness planer is one of the most useful machines in a woodworking shop. It allows you to quickly remove material and create boards with consistent thickness. However, there's one important thing to understand: A thickness planer does not flatten a twisted or uneven board on its own. A planer references the surface of the board that rests on the machine's bed. If that surface is twisted, bowed, or cupped, the planer will generally reproduce those imperfections on the opposite face. To solve this problem, you'll need to use a planer sled or another method to establish a flat reference surface first.
What You'll Need
A thickness planer
A planer sled or flat support board
Shims
Hot glue or another suitable method of securing shims
A straightedge
Step 1: Prepare Your Board
Inspect the rough lumber and identify any twist, bow, or cup. Place the board on your planer sled. The sled should be flat and long enough to support the entire board.
Step 2: Secure the Board
Position the board on the sled and use shims to fill any gaps underneath it. The goal is to prevent the board from rocking or shifting as it passes through the planer. Secure the board and shims so everything stays in place during operation. Make sure no part of the board or shims can come loose and become a hazard.
Step 3: Run the Board Through the Planer
Set your planer for a shallow cut and slowly feed the sled and board through the machine. Continue making light passes until the entire upper surface is clean and flat. Avoid removing too much material in a single pass. Light cuts help reduce tear-out and minimize stress on your equipment.
Step 4: Flatten the Opposite Face
Once the first face is flat, remove the board from the sled and place the newly flattened face against the planer bed. Run the board through the planer until the opposite face is flat and the board reaches your desired thickness.
Advantages: A thickness planer is fast, produces consistent thickness, and is especially useful when preparing multiple boards.
Disadvantages: A planer alone cannot correct twist or bow. You'll need a sled or another flattening method to establish the first flat surface.
Method 3: Flattening Rough Lumber With a Router Sled
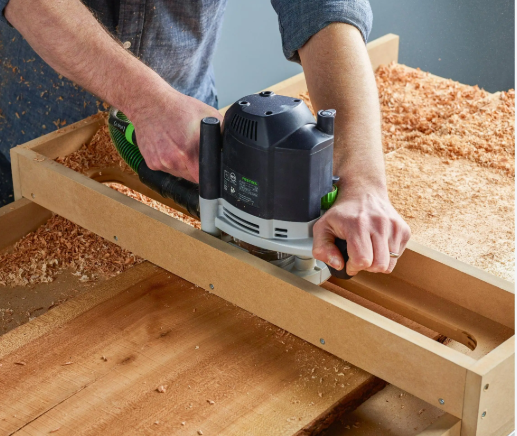
If you're working with large boards, live-edge slabs, or lumber that won't fit through your planer, a router sled is an excellent option. A router sled uses a router mounted to a sliding carriage that travels across a pair of parallel rails. This allows you to remove material gradually while keeping the cutting surface level. It's also a great option for woodworkers who don't own a jointer or thickness planer.
What You'll Need
A router
A suitable flattening bit
A router sled or DIY router sled setup
Two straight, parallel rails
A flat base or work surface
Clamps and shims
Step 1: Set Up Your Router Sled
Position your rails on either side of the board. The rails need to be straight, stable, and parallel to each other. Make sure they are level and properly supported. Place your router into the sled carriage and verify that it moves smoothly across the entire length and width of the board.
Step 2: Secure Your Lumber
Place the rough board between the rails. Use shims to prevent rocking and secure the board with clamps or another appropriate holding method. Make sure the board cannot move while you're routing.
Step 3: Begin Flattening
Install the appropriate router bit and set the cutting depth for a shallow pass. Move the router sled slowly across the board, overlapping each pass slightly. Continue working across the entire surface until you've removed the high spots and created a consistent flat face. Check your progress with a straightedge as you work.
Step 4: Flip the Board and Flatten the Other Side
Once the first face is flat, you can flip the board and use the newly flattened surface as your reference. Depending on the setup, you may need to reposition the rails or use a flat support surface. Continue routing until the opposite face is flat and the board reaches your desired thickness.
Advantages: A router sled can handle large slabs and wide boards, doesn't require a jointer, and can be built relatively inexpensively.
Disadvantages: It can be slower than using a planer, requires careful setup, and may leave ridges that need additional sanding or planing.
Final Thoughts
Flattening rough lumber is an essential woodworking skill that can make a huge difference in the quality of your finished projects. Whether you choose a traditional handplane, a thickness planer with a sled, or a router sled, the goal is always the same: establish one flat reference face, flatten the opposite face, and prepare your lumber for your next project. You don't need the most expensive equipment in the world to get great results. With the right technique, a little patience, and the tools available in your workshop, you can turn rough, uneven lumber into flat, beautiful material ready for almost any woodworking project.
Happy woodworking!